Overview
The Razorpay Payment Gateway feature allows you to seamlessly accept payments from users directly within your MagicAI application. With this integration, you can securely charge users for services, subscriptions, or products using one of the most trusted payment platforms in India.
Prerequisites
Before integrating Razorpay with MagicAI, ensure you have the following:
- A Razorpay account
- API Key ID and Secret
- Access to MagicAI’s admin panel
Setup Instructions
1. Obtain Razorpay API Credentials
- Login to your Razorpay Dashboard
- Navigate to Settings > API Keys
- Generate or copy your Client ID and Secret Key
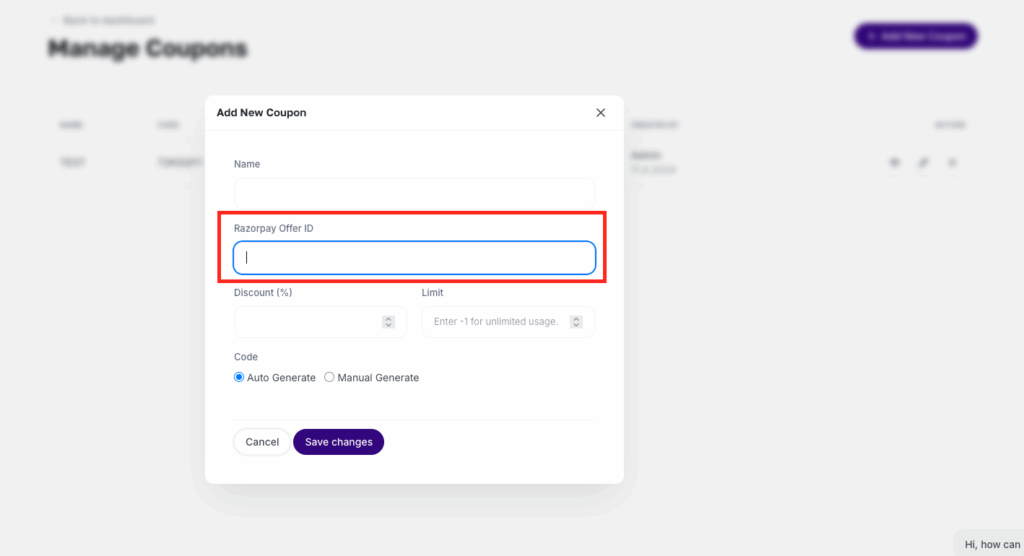
2. Configure MagicAI Payment Gateway
- Go to MagicAI Dashboard > Payment Gateways > Razorpay Settings
- Enter your Razorpay Client ID and Secret Key
- You can use Razorpay’s test keys to simulate transactions.
- Enable the integration and save changes.
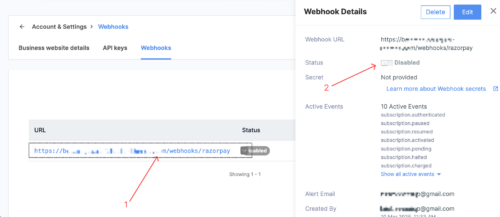
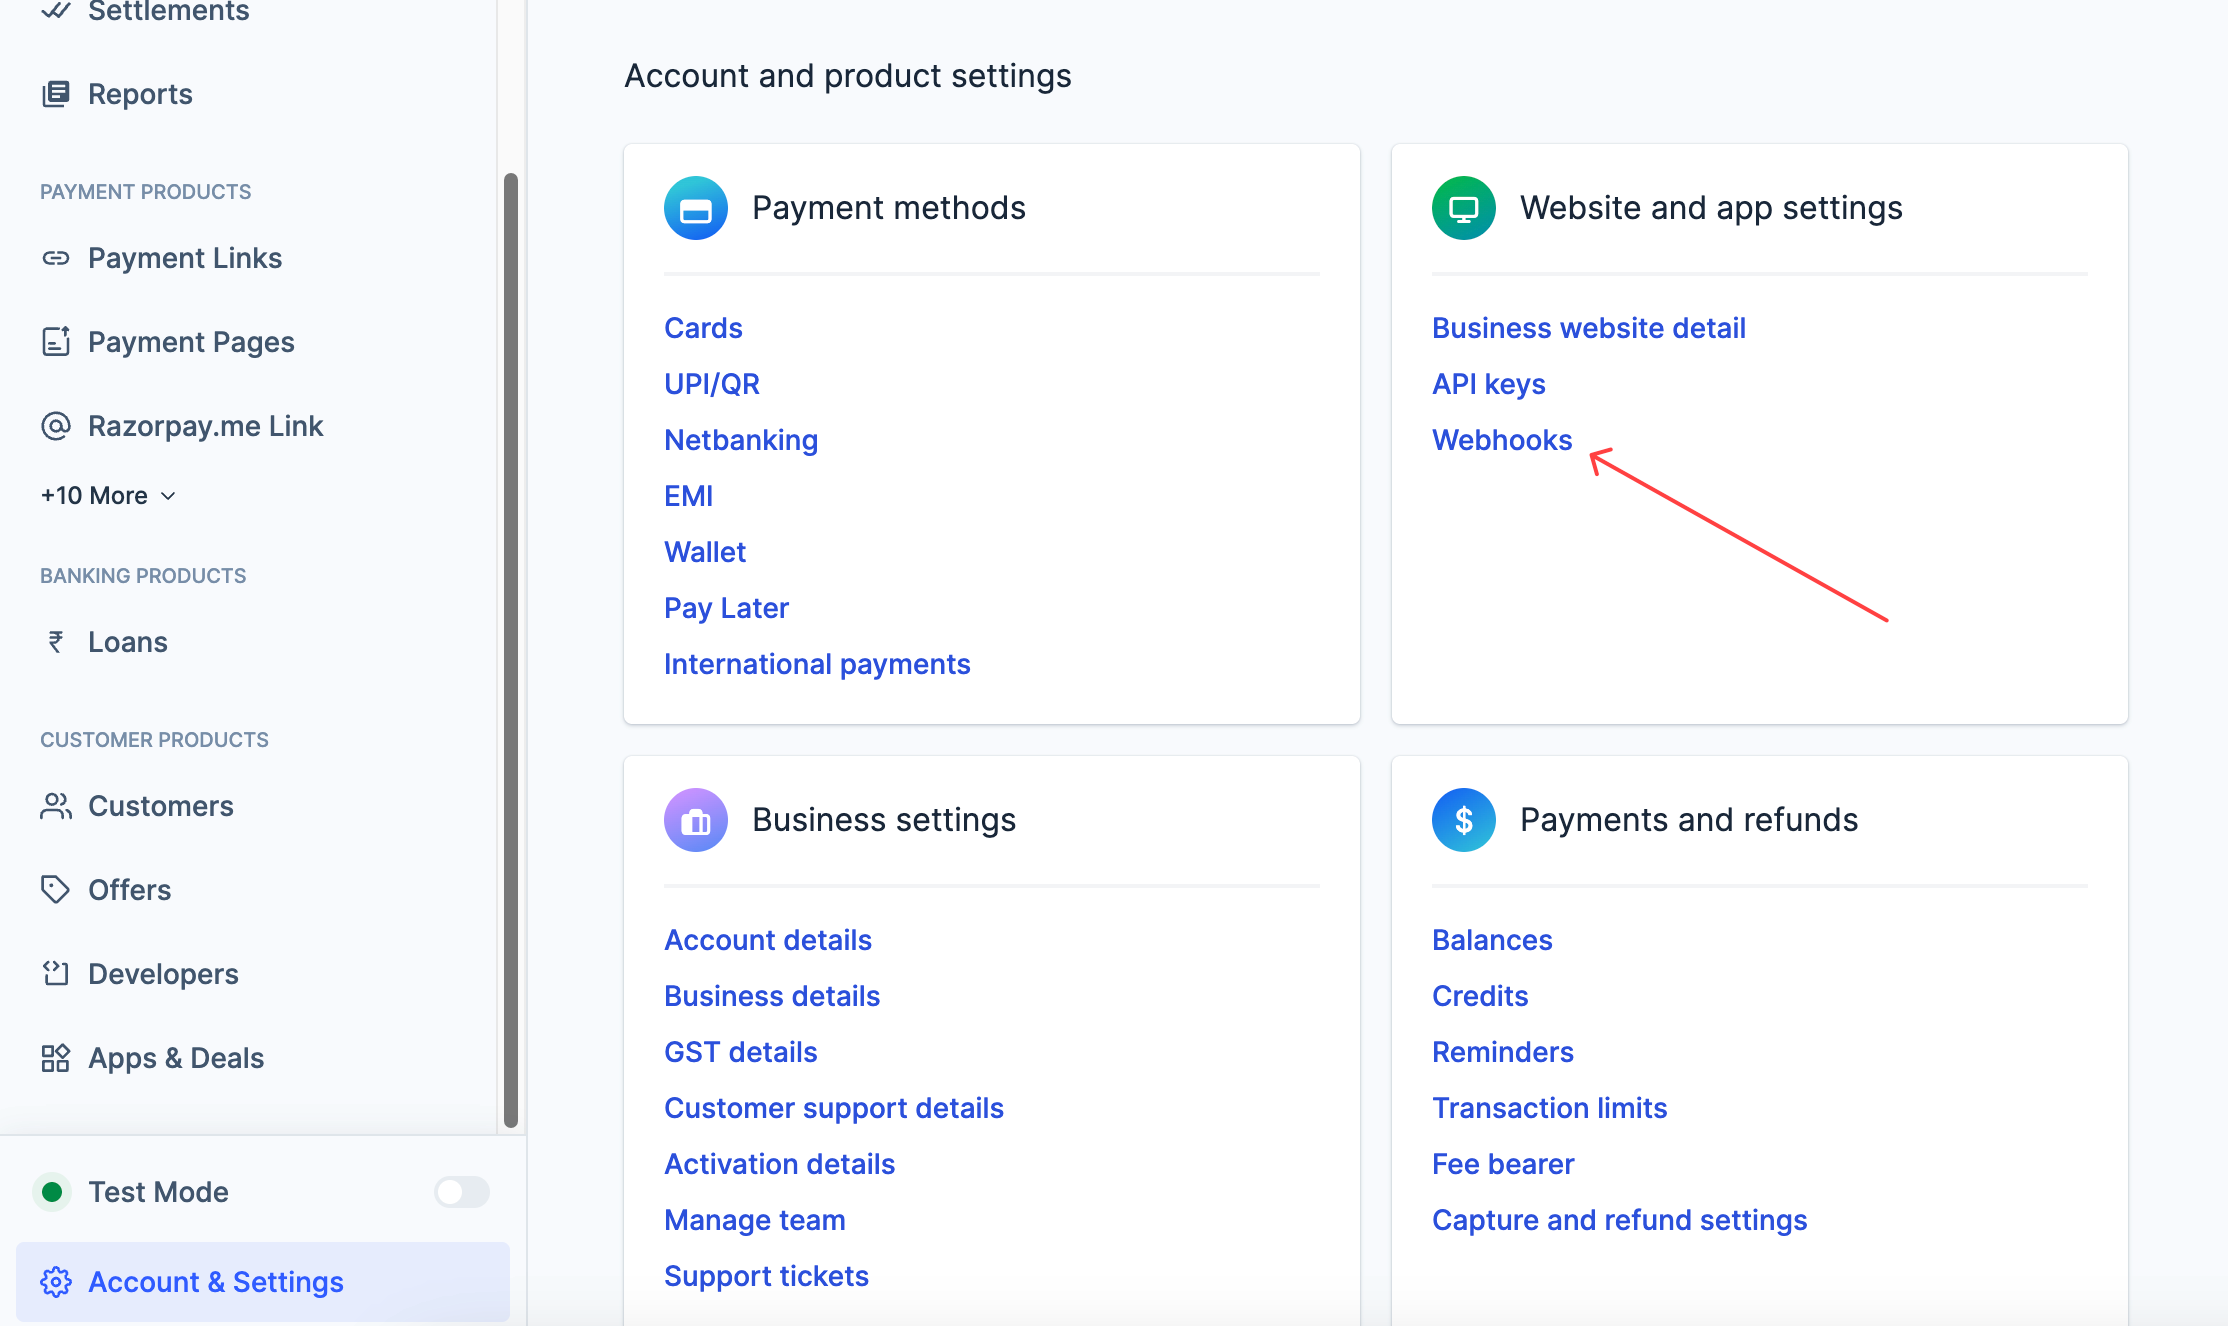
3. Set Up Webhook
- Copy the Webhook URL provided in MagicAI Dashboard > Payment Gateways > Razorpay Settings
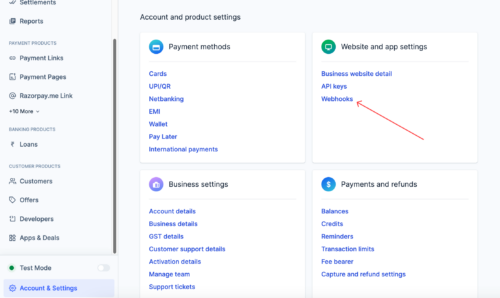
- Login to your Razorpay Dashboard
- Go to Account & Settings > Webhooks
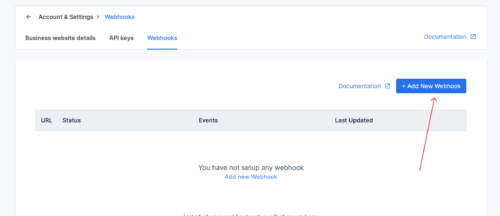
- Click Add New Webhook
- Paste the copied URL and select subscription events and save changes.
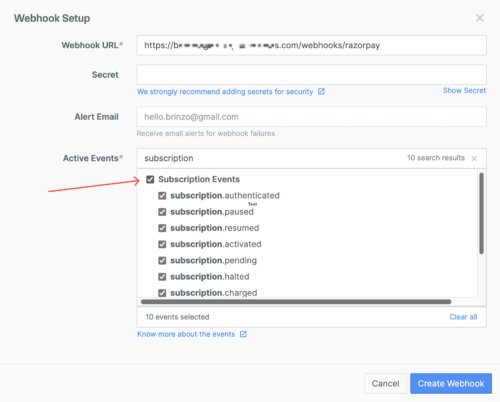
- Enable the webhook you created.


4. Go Live
- Switch from test credentials to live credentials in the admin panel
- Verify the environment is set to “Live”
- Start accepting real payments from users