
Type and hit enter
The Shopping Assistant is a powerful new feature that allows your chatbot to interact directly with your e-commerce store. By enabling this, your chatbot can provide real-time updates on order status, tracking information, and product availability to your customers.
Navigate to your MagicAI Dashboard and go to the AI Chatbot section.
Select Add New Chatbot or edit an existing one.
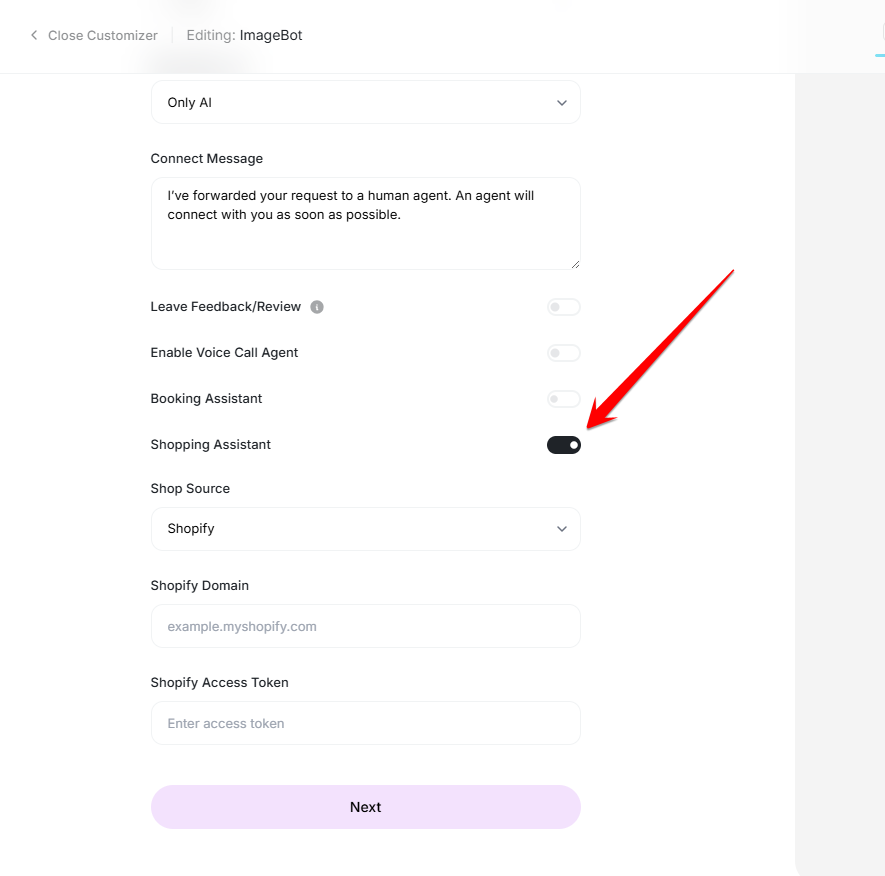
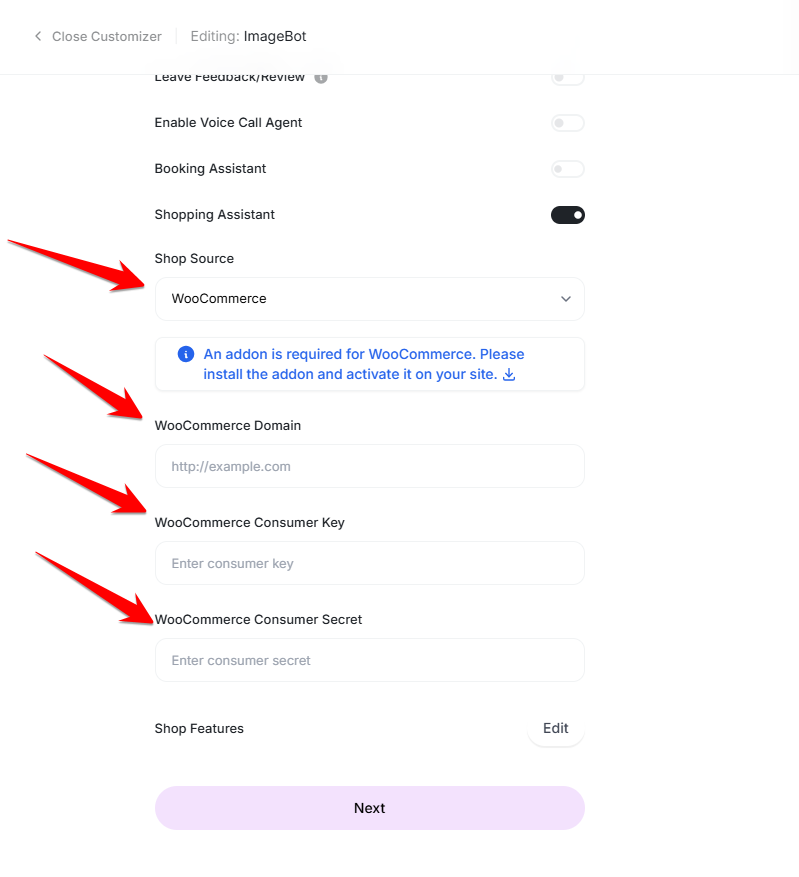
In the configuration settings, locate the Shopping Assistant toggle.
Switch the toggle to Enabled.
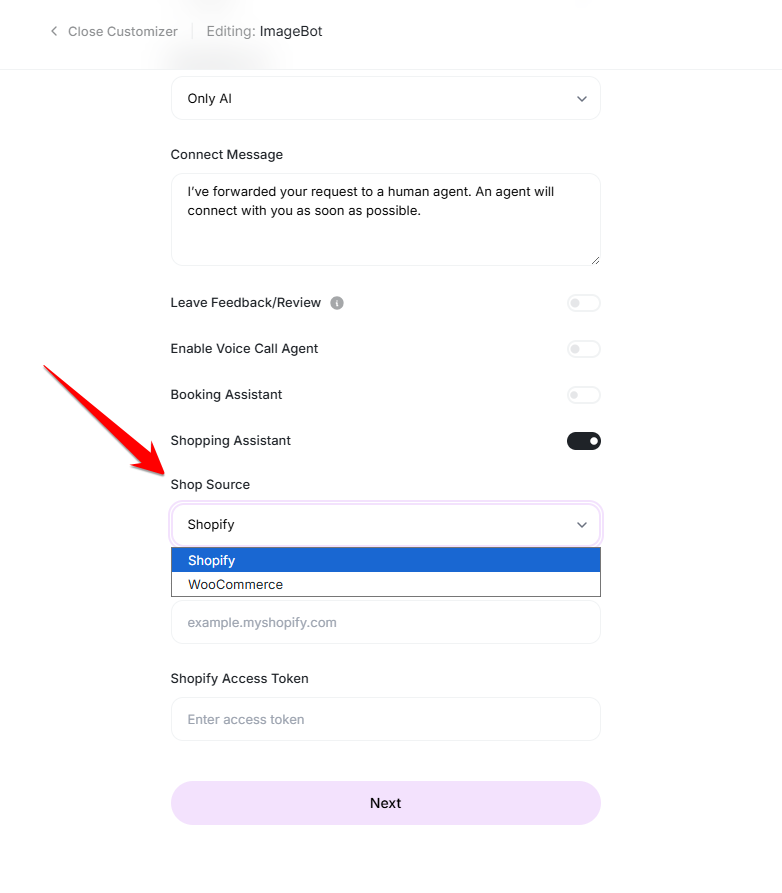
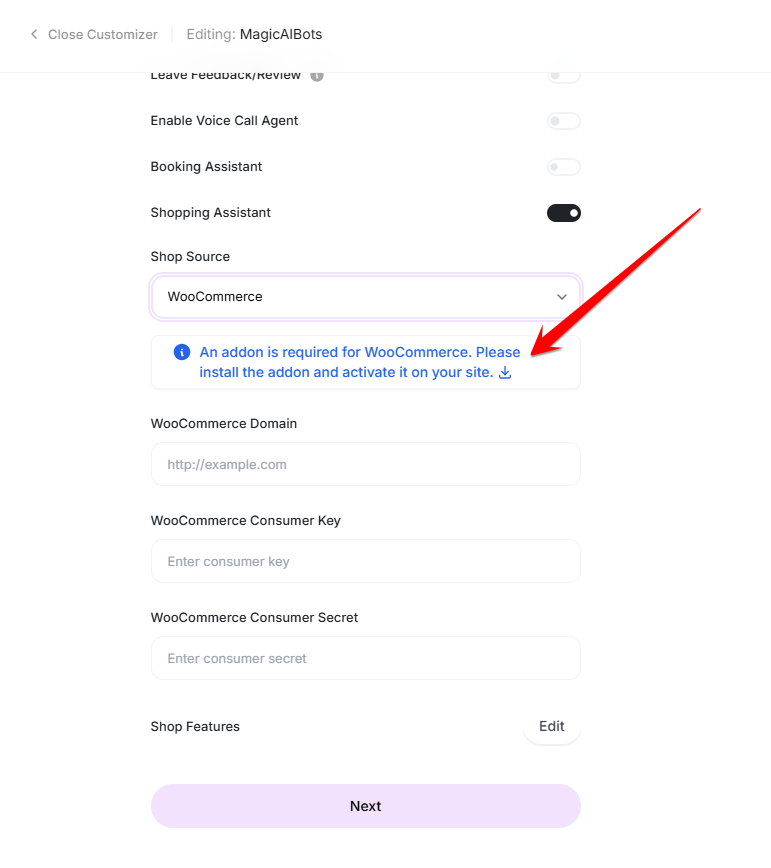
Once enabled, you will see a dropdown to select your Shop Source. MagicAI currently supports two major e-commerce platforms:
Shopify
WooCommerce
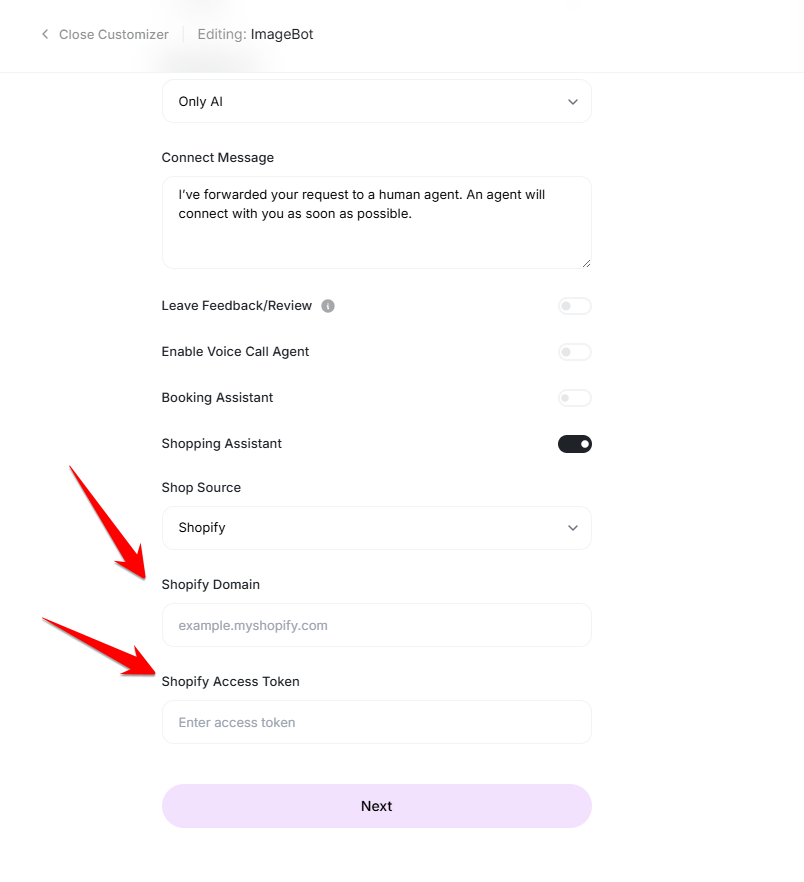
To connect your Shopify store, you will need to provide your store’s API credentials to allow the chatbot to securely fetch data.
Shopify Domain: Enter your official .myshopify.com URL (e.g., your-store-name.myshopify.com).
Access Token: Enter your Admin API access token.
Note: You can generate this in your Shopify Admin under Settings > Apps and sales channels > Develop apps. Ensure the app has “Read” permissions for Orders and Products.
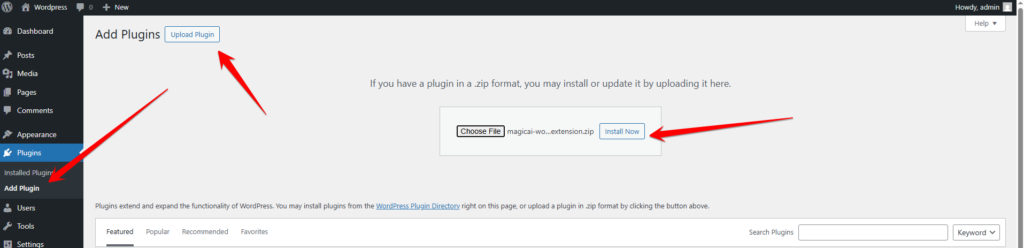
To connect a WooCommerce store, first download the WooCommerce plugin available in the chatbot.
Go to your wordpress site and install the plugin. Make sure you have installed WooCommerce plugin.
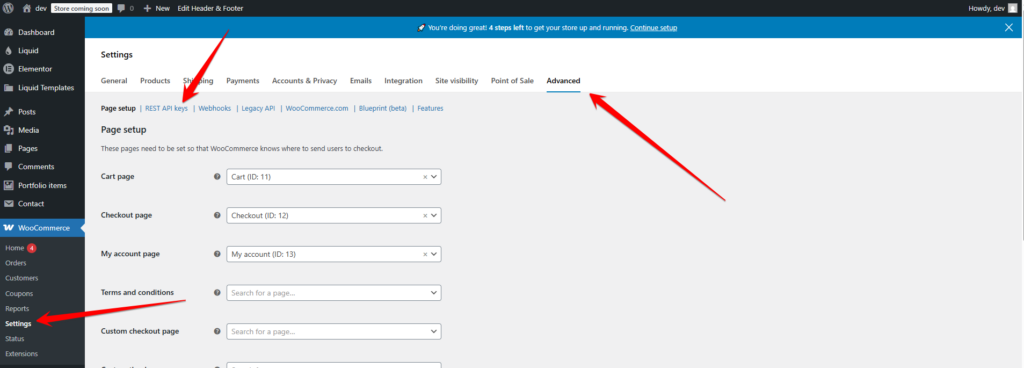
Go to Advanced in WooCommerce Settings and click on REST API keys.
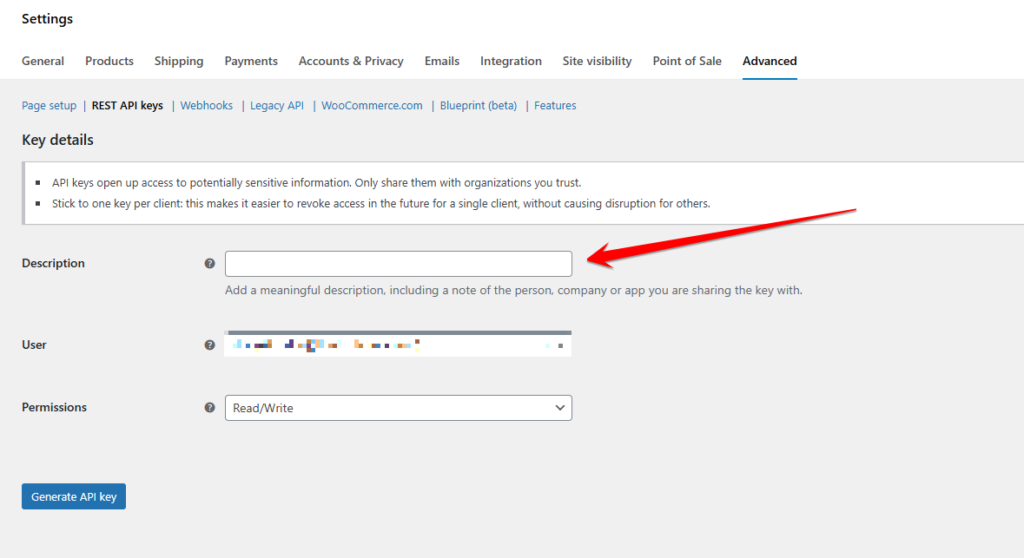
Click on Add New key.
Add the description of the key and set the permissions to Read/Write.
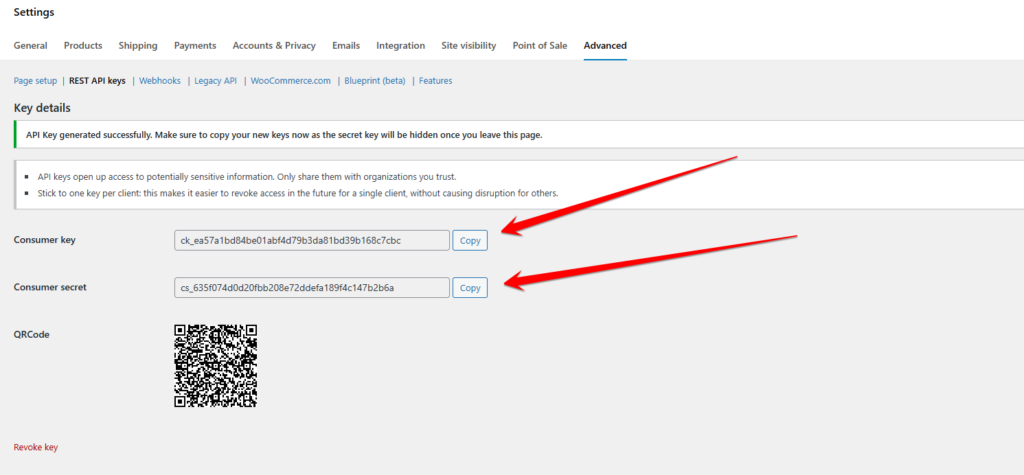
The API keys will be generated. You will need to add them in the chatbot.
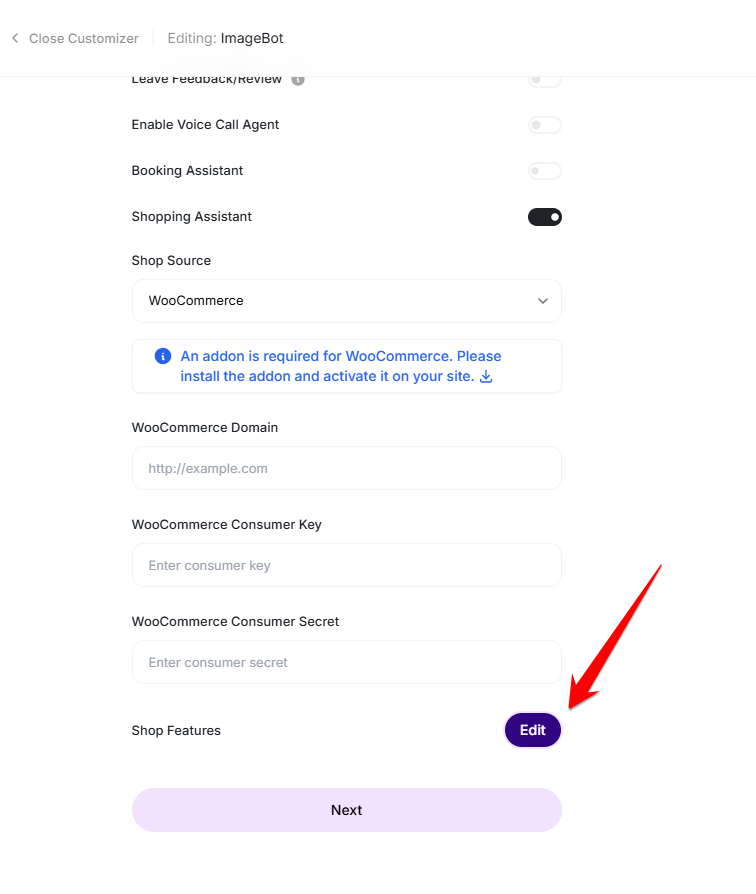
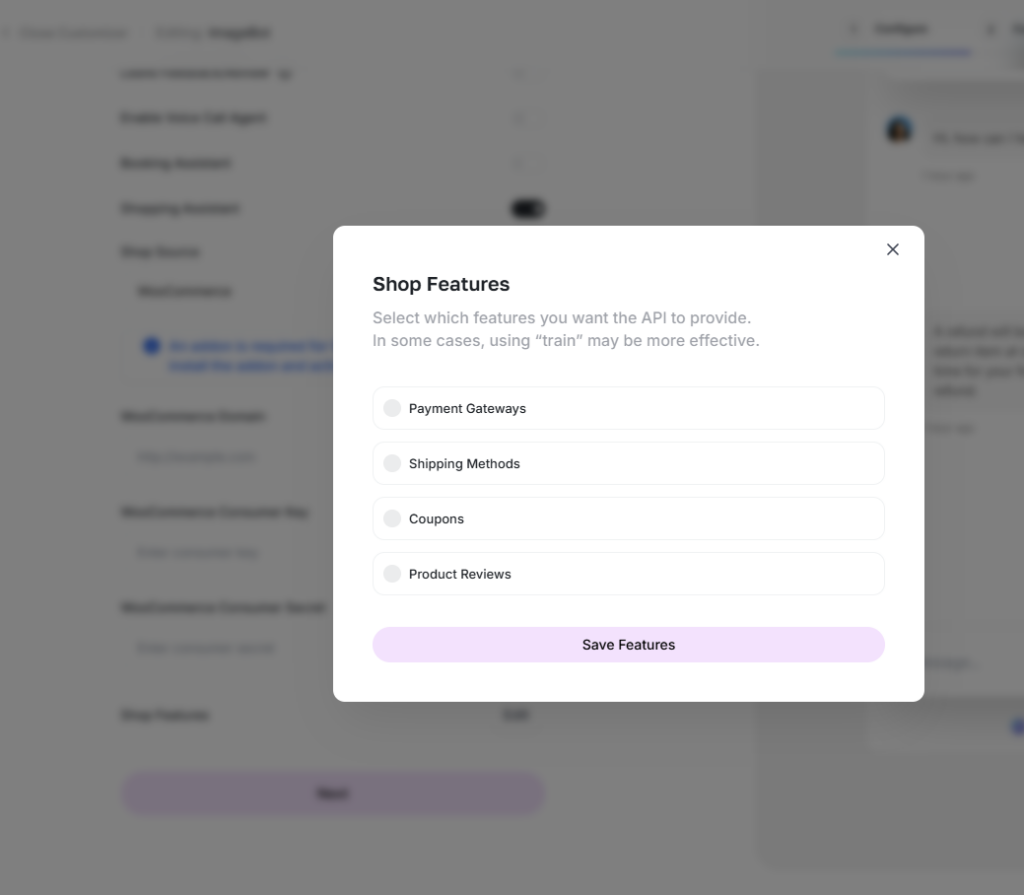
The Shopping Assistant now includes an expanded suite of Shop Features that give you granular control over the customer’s checkout and post-purchase experience. You can toggle these options on or off to match your store’s specific workflow.
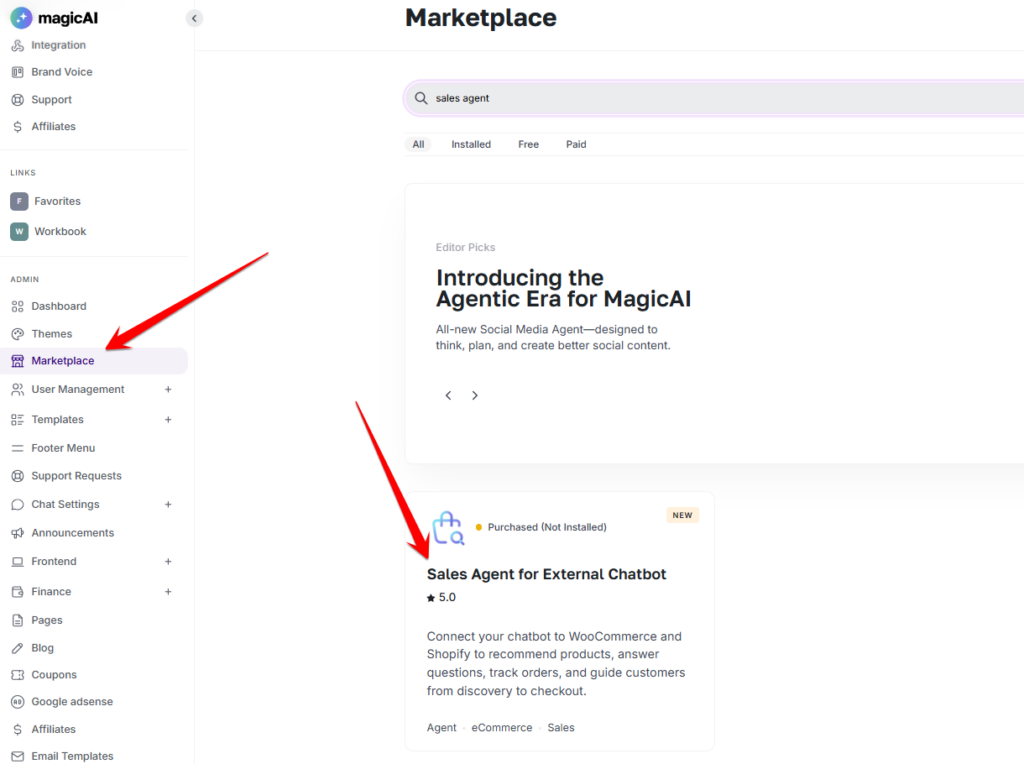
To use this feature, you will need to install the add-on from the marketplace.
Adding {{itemName}} to cart
Added {{itemName}} to cart