Type and hit enter
AI Agent turns instructions into automated workflows that run on their own. Users describe what they want an agent to do, choose when it should run (on a schedule or when a channel message arrives), and the system builds a working agent that carries out a chain of actions across email, chat channels, reports, and other MagicAI tools. Agents can be created conversationally through the Copilot or assembled visually on a drag-and-drop canvas. The tool is accessible from the side menu under AI Agent.
Before users can create and run agents, complete the following steps:
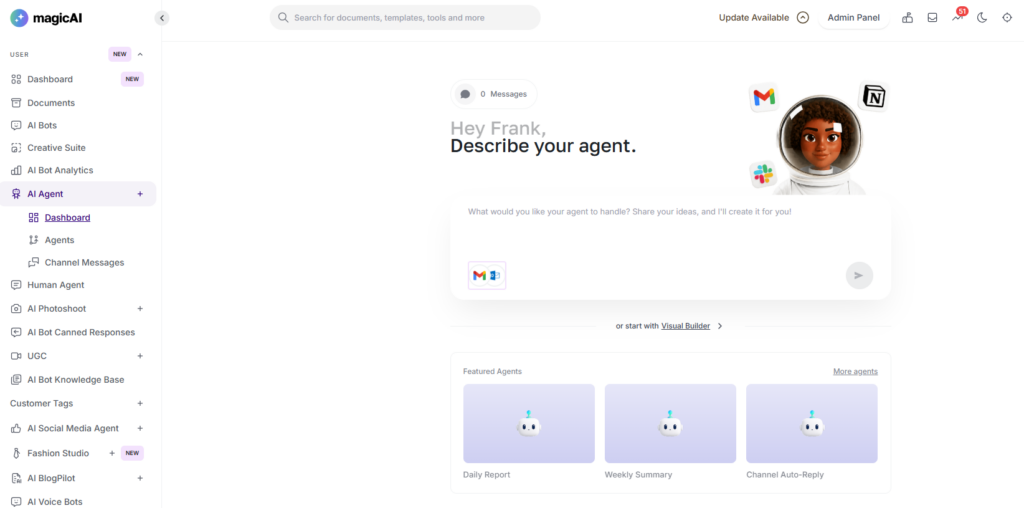
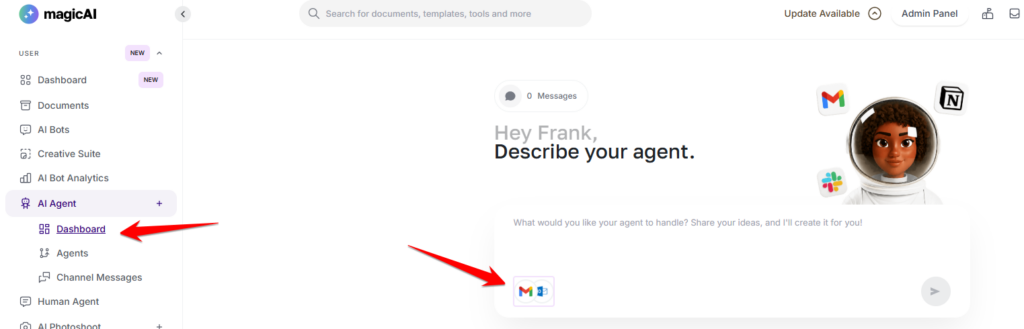
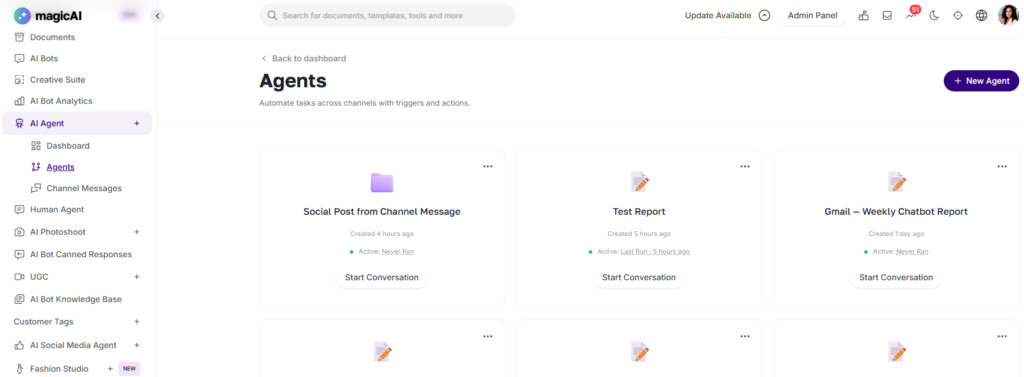
Navigate to AI Agent from the side menu to open the Dashboard. From here you can describe a new agent in plain English, open the Visual Builder, or start from a Featured Agent template (Daily Report, Weekly Summary, Channel Auto-Reply, Morning Briefing, Daily Content Ideas). Use Manage Connectors to link your Gmail or Outlook account before building an email-based agent. Agents you have already created appear under My Agents, each showing its status and last run time, with a Start Conversation shortcut and an Agent Options menu.
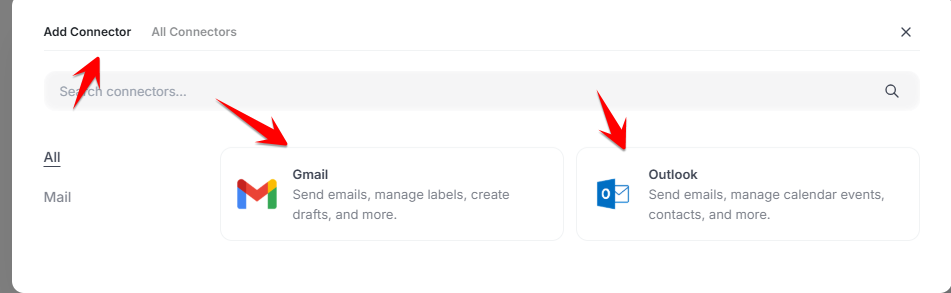
On the Dashboard, click Manage Connectors, then Add Connector, and choose Gmail (send emails, manage labels, create drafts) or Outlook (send emails, manage calendar events, contacts). Sign in securely with the provider to link the account. Connected accounts appear under All Connectors, where you can reconnect or remove them at any time.
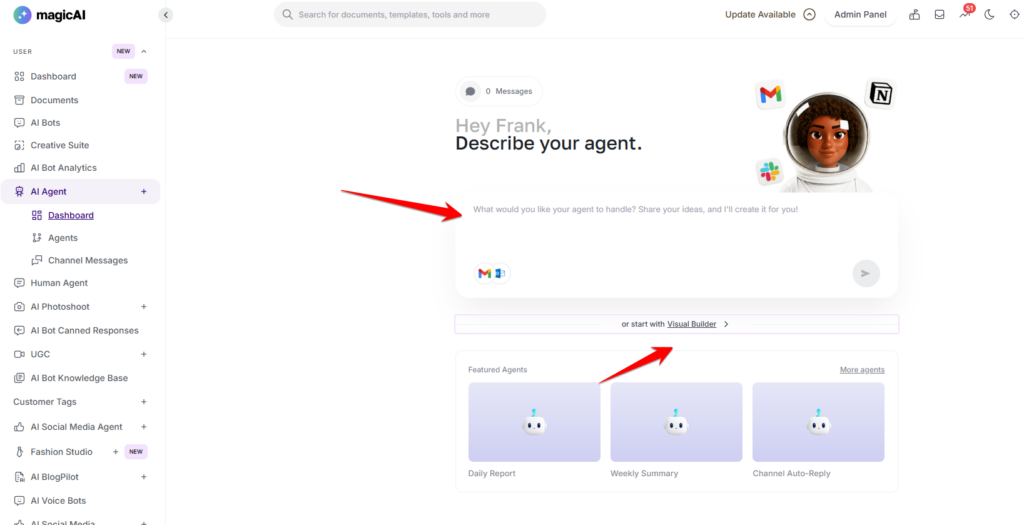
In the Describe your agent box, type what you want in plain English — for example, “Every weekday at 9 AM, summarise yesterday’s Gmail and send it to my Telegram channel.” The Copilot builds the trigger and steps for you, and you can keep chatting to refine them. Alternatively, open the Visual Builder to assemble the agent yourself on the canvas.
Click the Trigger node and select how the agent should start:
Schedule — Run on a recurring timetable. Presets include Weekdays 9 AM, Every Day 9 AM, Mondays 9 AM, 1st of Month, Every Hour, and Every 30 Min, or choose Custom schedule. Channel Message — Run whenever a message arrives on a connected channel. Use this for auto-replies and conversational agents.
Click + to open Add Step and choose what the agent should do. Steps are grouped into categories (AI, Agents, Channels, Flow Controls, Utilities, Custom). Available steps include:
Ask Agent — Send a message to an AI model and store the response. Send Message — Send a message to a connected channel (Telegram, WhatsApp, etc.). Generate Report — Generate an AI-summarised activity report for a date range. GMail — Send emails, read them, manage labels, drafts, and more. Outlook — Send emails, manage calendar events, contacts, and more. Path — Split execution into multiple branches based on conditions. Social Media Agent — Create and approve posts and fetch post analytics. Marketing Bot — Manage campaigns, get stats, and schedule sends. External Chatbot — List chatbots, get analytics, manage conversations, and close tickets.
Chain as many steps as needed; each step can use the output of the steps before it.
For agents using a Channel Message trigger, click Test Agent to send a test message and confirm the workflow behaves as expected. Click Save, then set the agent Active to start running. You can Pause an agent at any time.
Go to AI Agent → Agents to see every agent, with its status (Active, Paused, Never Ran, or Last Run time), a Start Conversation shortcut, and an Agent Options menu to edit, pause, or remove it.
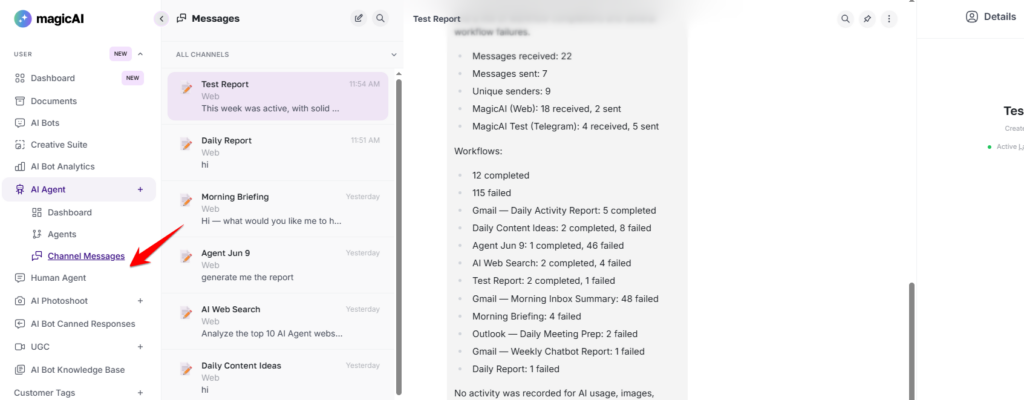
Go to AI Agent → Channel Messages to see all conversations your agents are having, filterable by channel (All Channels, web chat, individual Telegram channels). Select a conversation to read the full history, reply directly, and review what the agent produced. Each thread includes Details and Logs tabs so you can inspect the agent’s configuration and trace exactly how each run executed.
AI Agent is configured across three admin pages:
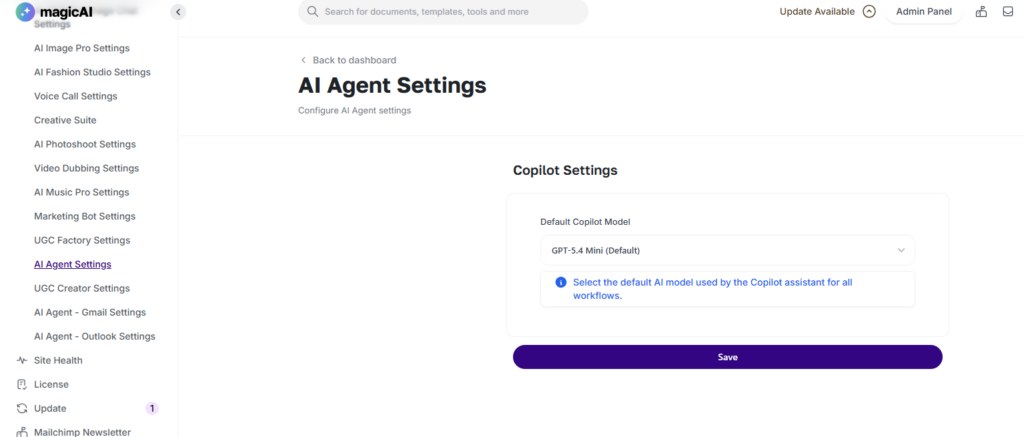
Settings → AI Agent Settings — Set the Default Copilot Model used by the Copilot assistant for all workflows (GPT-5.4 Mini, GPT-5.4 Nano, GPT-5 Mini, or GPT-5 Nano). Click Save.
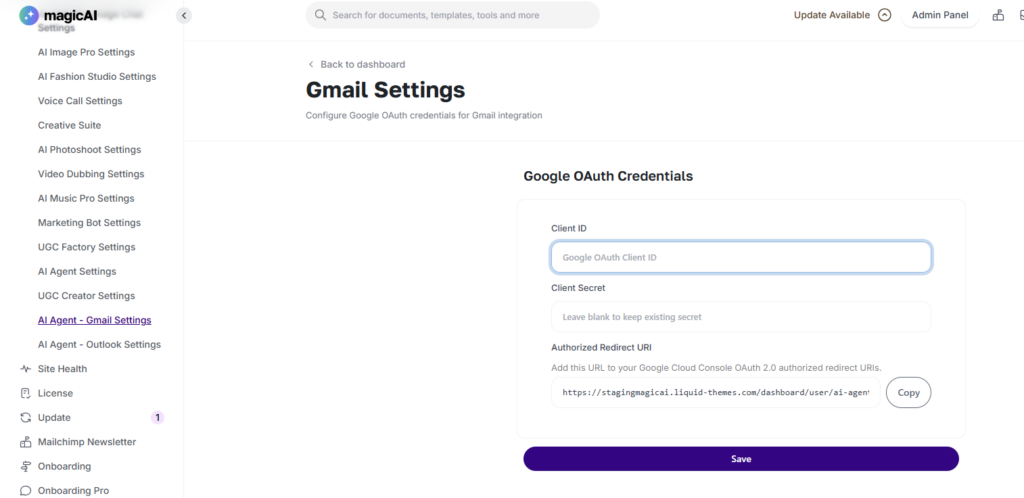
Settings → AI Agent – Gmail Settings — Enter the Google OAuth Client ID and Client Secret, then copy the Authorized Redirect URI and add it to your Google Cloud Console OAuth 2.0 authorized redirect URIs. Click Save.
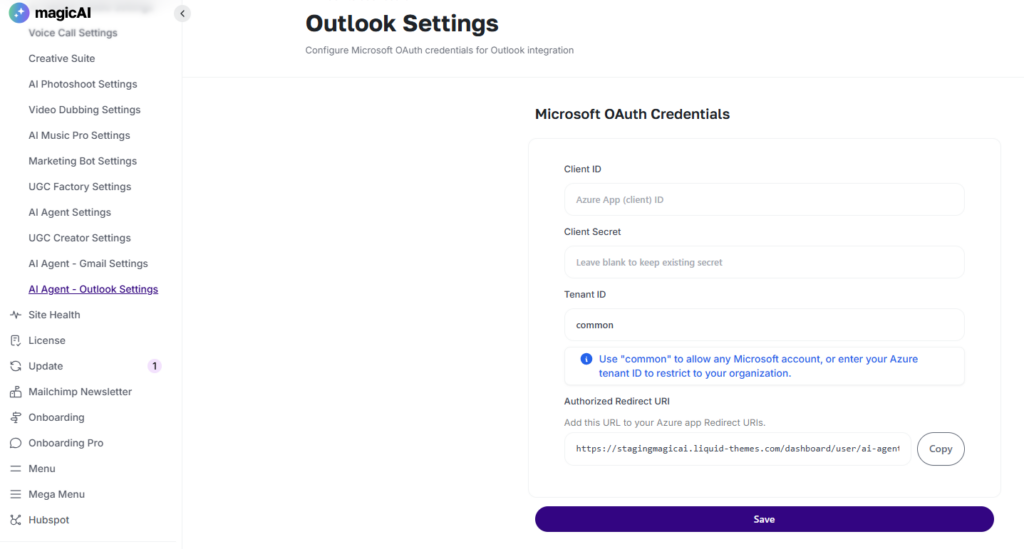
Settings → AI Agent – Outlook Settings — Enter the Microsoft OAuth Client ID, Client Secret, and Tenant ID (use “common” for any Microsoft account, or your Azure tenant ID to restrict to your organisation), then copy the Authorized Redirect URI and add it to your Azure app’s Redirect URIs. Click Save.
Click Save after making any changes.
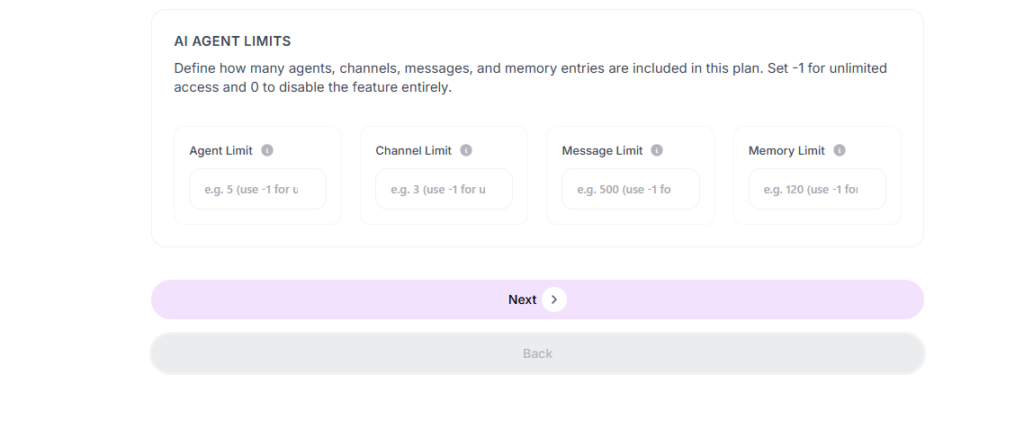
Set per-plan usage limits at Finance → Pricing Plans. Edit a plan and locate the AI Agent Limits section, which defines how many agents, channels, messages, and memory entries are included in that plan. Set –1 for unlimited access, or 0 to disable the feature entirely.
Agent Limit — Maximum number of agents a user on this plan can create. Channel Limit — Maximum number of connected channels allowed. Message Limit — Maximum number of messages agents can process. Memory Limit — Maximum number of memory entries agents can store.
Click Save (or proceed through the plan steps) to apply the limits.
Adding {{itemName}} to cart
Added {{itemName}} to cart