Introduction
UGC Factory lets users generate realistic User Generated Content (UGC) videos for social media and marketing — without actors, studios, or cameras. Users write a script, choose a voice, pick a pre-built AI actor from a curated library, select a scene, and generate a ready-to-publish UGC-style video. The tool is accessible from the side menu under UGC → Factory. Powered by Veed Fabric 1.0.
Requirements
- Prerequisite: UGC Factory must be installed and active on your workspace.
- Installation: Install UGC Factory from the Marketplace.
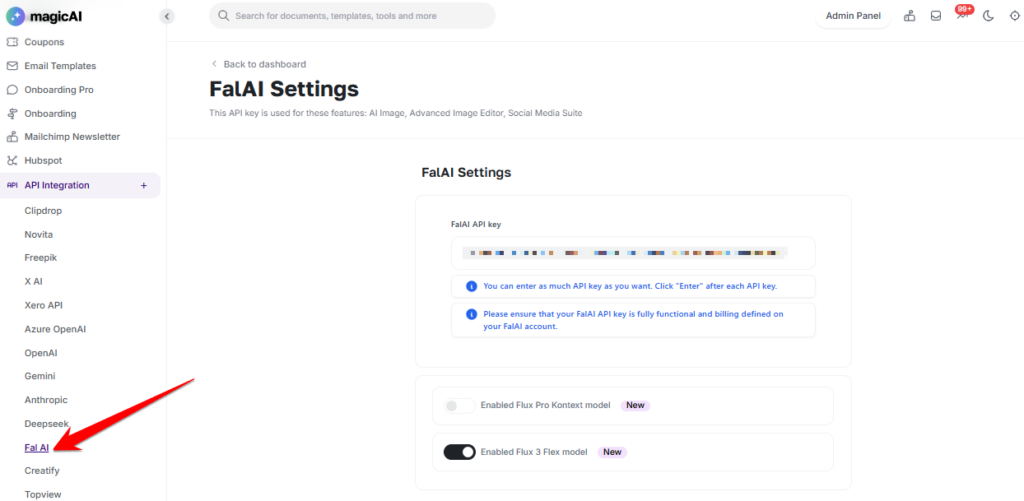
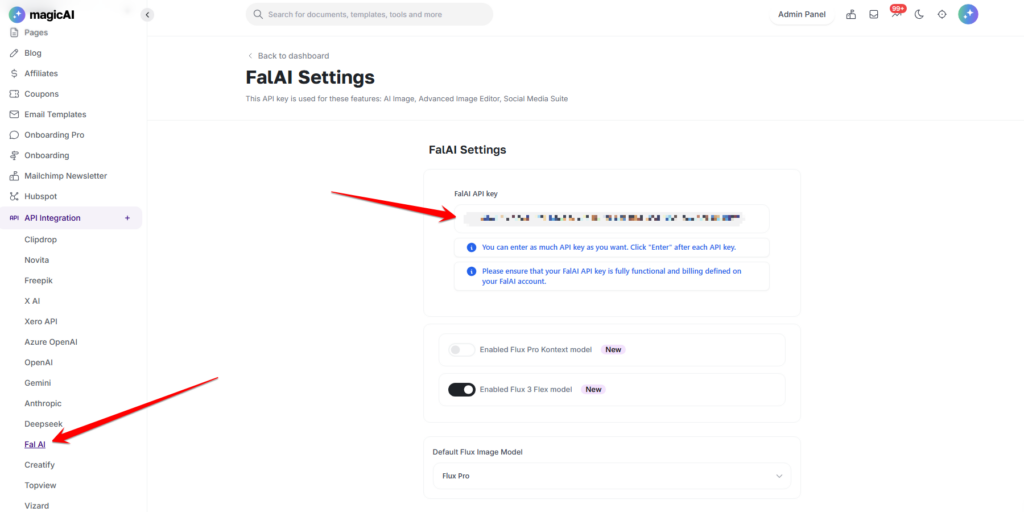
- API Key: A FAL AI API key is required. Add it at API Integration → FAL AI.
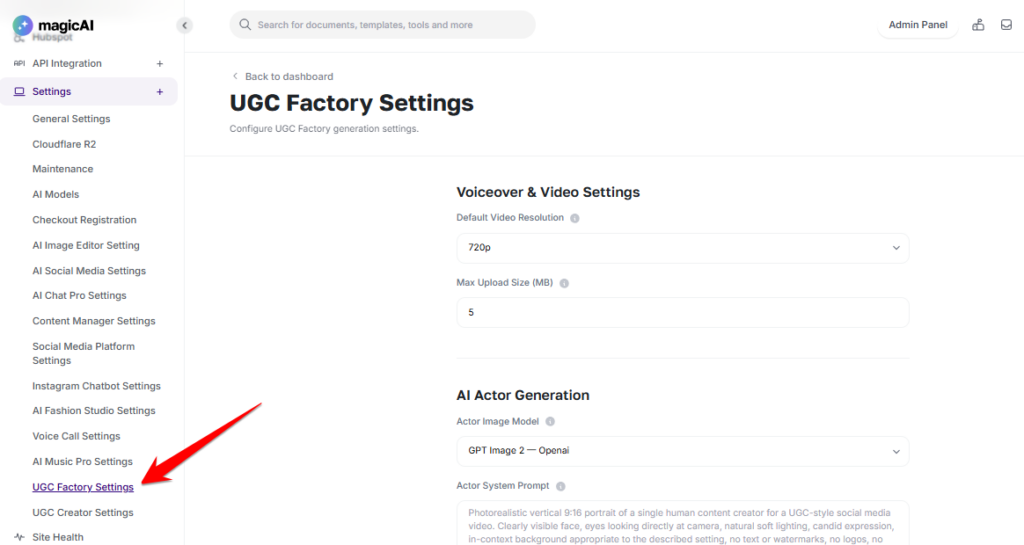
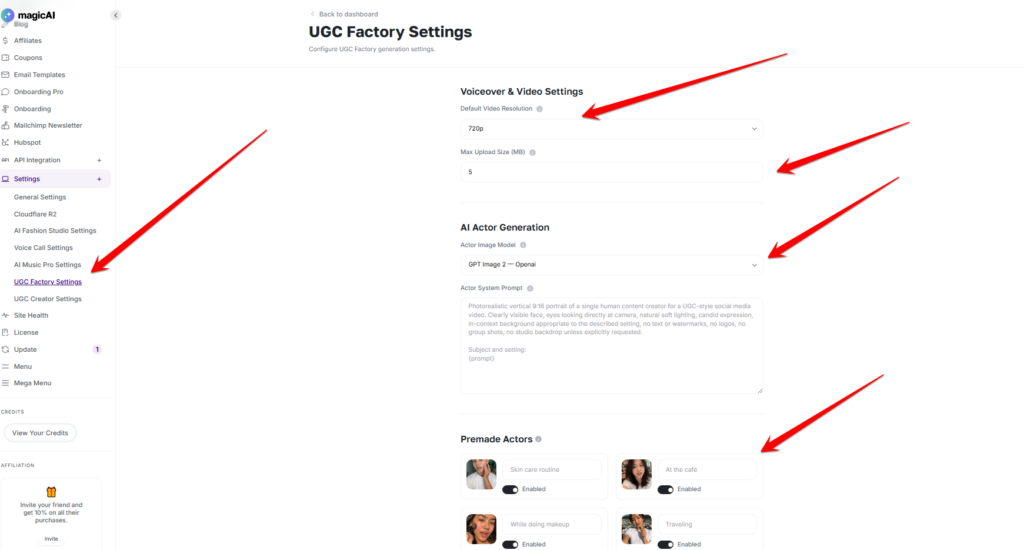
- Configure: Video resolution, upload size, actor image model, actor system prompt, and premade actor visibility are managed at Settings → UGC Factory Settings.
- Plan Access: Enable or disable UGC Factory per pricing tier via Finance → Pricing Plans.
Activation
Before users can generate UGC videos, complete the following steps:
Step 1 — Install: Go to Marketplace and install UGC Factory.
Step 2 — Add API Key: Navigate to API Integration → FAL AI and enter your FAL AI API key. UGC Factory uses the Fabric 1.0 model from FAL AI to generate actor videos. Without a valid API key, video generation will not work.
Step 3 — Configure Settings: Go to Settings → UGC Factory Settings and configure the default video resolution, max upload size, actor image model, and actor system prompt.
Step 4 — Enable on Plans: Go to Finance → Pricing Plans, select each plan that should include UGC Factory, and enable it.
Getting Started
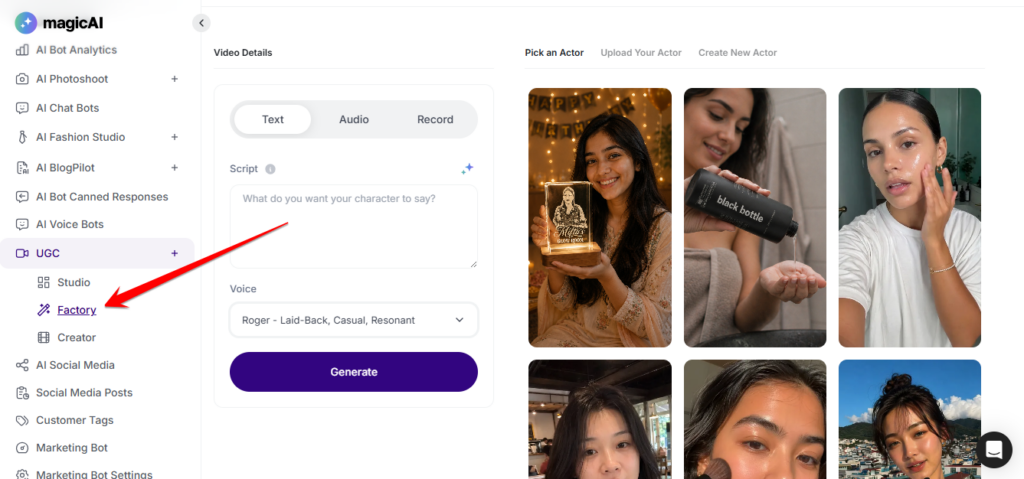
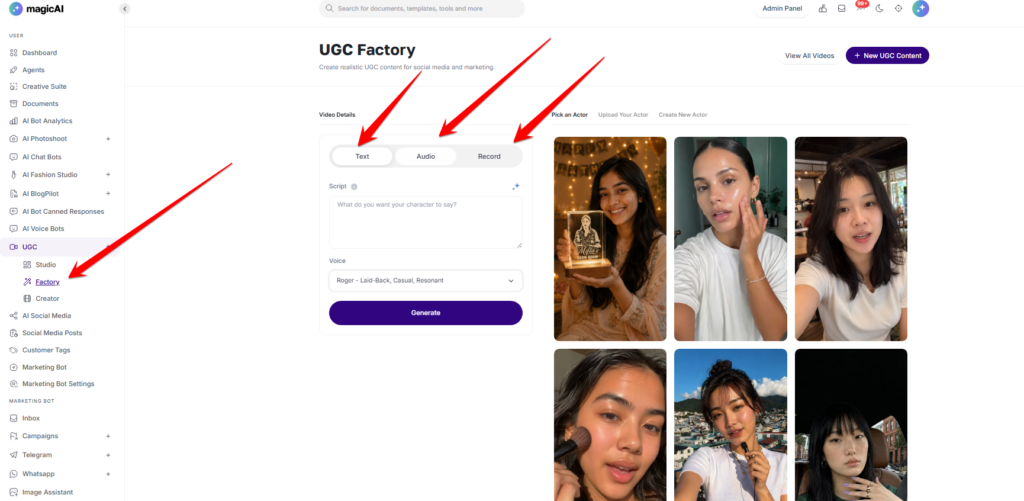
Navigate to UGC → Factory from the side menu. The page displays the video creation interface with options for script input, voice selection, actor selection, and scene selection. Click View All Videos to browse previously generated UGC content. Click New UGC Content to start a new session.
How to Create a UGC Video
1. Provide Your Script or Audio
The input panel has three tabs. Only one tab is used at a time — whichever tab is active determines how the audio for the video is provided:
Text — Type or paste your script into the text field. The script is converted to speech using the selected voice. Use this when you want to write the content and have the AI deliver it.
⦁ Audio — Upload a pre-recorded audio file. The uploaded audio is used directly as the voiceover for the video, bypassing voice selection. Use this when you already have a finished recording.
⦁ Record — Record your voiceover directly in the browser using your microphone. The recorded audio is used as-is for the video. Use this when you want to deliver the script yourself in real time.
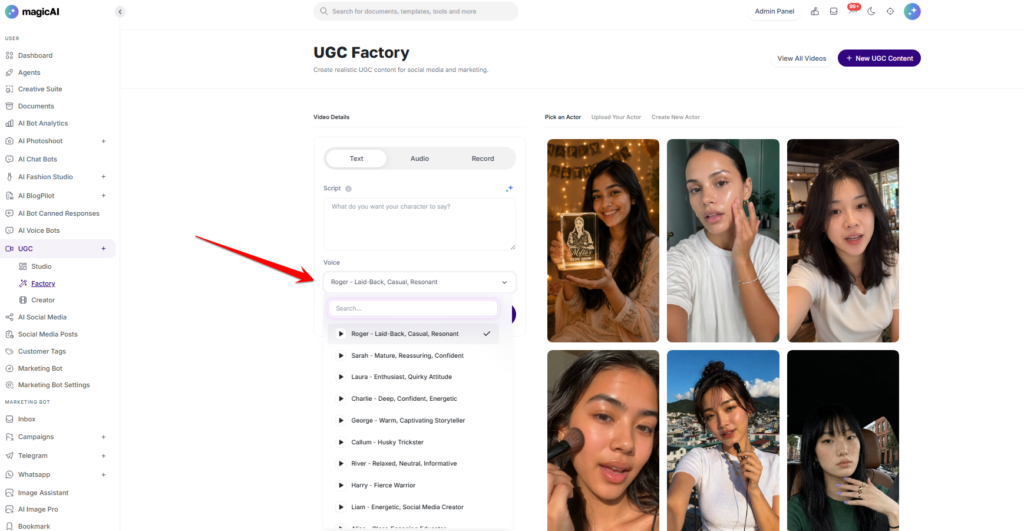
2. Select a Voice
If using the Text tab, choose a voice from the Voice dropdown. The selected voice converts your written script to speech in the generated video. Voices are listed with their name and style description (e.g. Roger — Laid-Back, Casual, Resonant).
Voice selection is not used when the Audio or Record tab is active, as the audio is provided directly by the user.
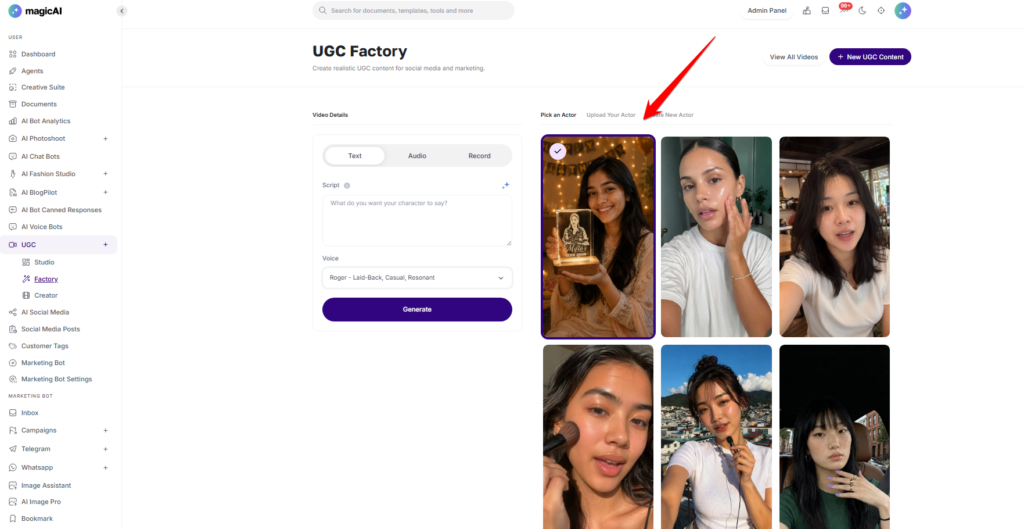
3. Pick an Actor
Select from three options in the actor panel:
⦁ Pick an Actor — choose from the built-in AI actor library
⦁ Upload Your Actor — upload a custom actor image or video
⦁ Create New Actor — build a new custom actor from scratch
The built-in actor library includes pre-built actors. Currently available: Mitu (A happy Bangladeshi Model).
4. Choose a Scene
Select the scene or context in which the actor will appear. Available scenes:
⦁ Skin care routine
⦁ At the café
⦁ While doing makeup
⦁ Traveling
⦁ Chatting in the car
⦁ In the kitchen
⦁ On the way to work
⦁ Recording a podcast
⦁ Walking on the street
⦁ Top view
⦁ Taking a break at the office
⦁ In a cozy home
⦁ Professional
⦁ Online Meeting
⦁ In the office building
⦁ In the living room
⦁ Working out at the gym
⦁ Cozy in the kitchen
⦁ Dev in the office
⦁ Gaming Session
⦁ Talking to the camera
5. Generate
Click Generate to produce the video. The system combines the audio source from the active tab (Text, Audio, or Record), the chosen actor, and the selected scene to render the final UGC video via Veed Fabric 1.0. Completed videos appear in the library and are accessible via UGC Studio Dashboard
Admin Controls
All UGC Factory settings are managed at Settings → UGC Factory Settings, organised into three sections:
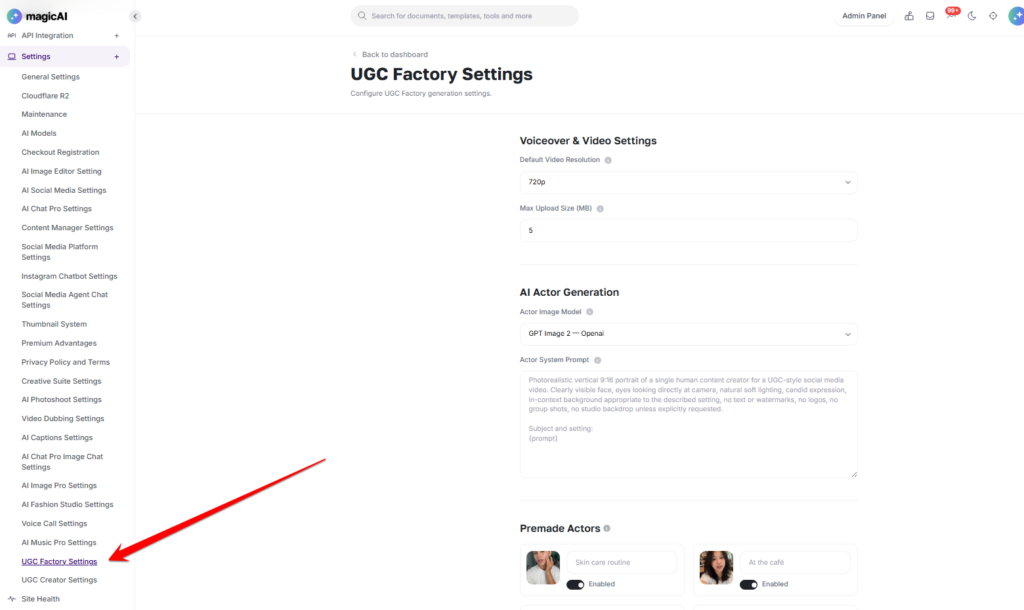
Click Save Settings after making any changes.
⚠️ Note: Plan-based access (enabling/disabling UGC Factory per pricing tier) is managed via Finance → Pricing Plans.