
Type and hit enter
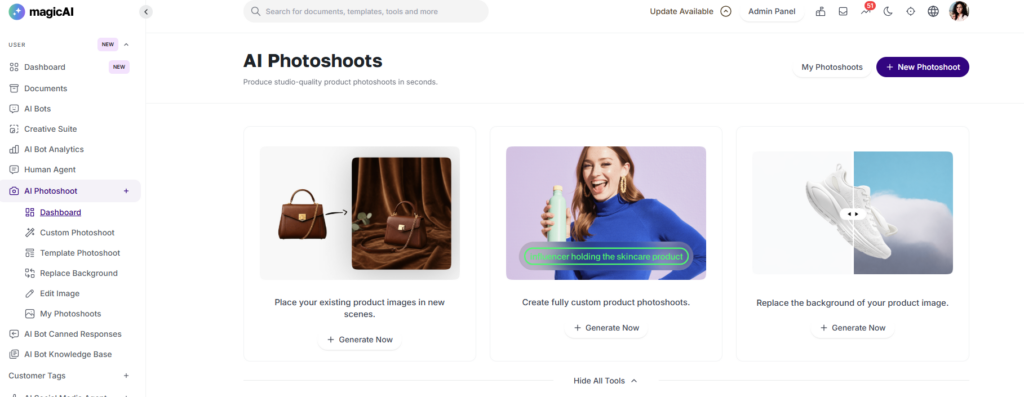
AI Photoshoot is a dedicated product photography studio powered by AI. It allows users to generate studio-quality product visuals through three independent creation flows — Custom Photoshoot, Template Photoshoot, and Replace Background — as well as post-generation image editing. The tool is accessible from the side menu under AI Photoshoot.
Navigate to AI Photoshoot from the side menu. The dashboard displays the three available creation flows with preview visuals: Template Photoshoot (place existing product images in new scenes), Custom Photoshoot (create fully custom product photoshoots), and Replace Background (replace the background of a product image). Click + New Photoshoot from any page to return to the dashboard and start a new session. All past generations are accessible via My Photoshoots.
Navigate to AI Photoshoot → Custom Photoshoot. This flow generates product images from a text description with no template required.
Upload a product or reference image (optional, max 5 MB) to guide the generation. Enter a detailed prompt in the Photoshoot Details field describing the scene, lighting, style, camera angle, and mood. Select the Ratio (e.g. Auto, 1:1, 16:9, 9:16) and choose the Number of Images to generate (up to 4 at a time). Click Generate to produce the results on the right panel.
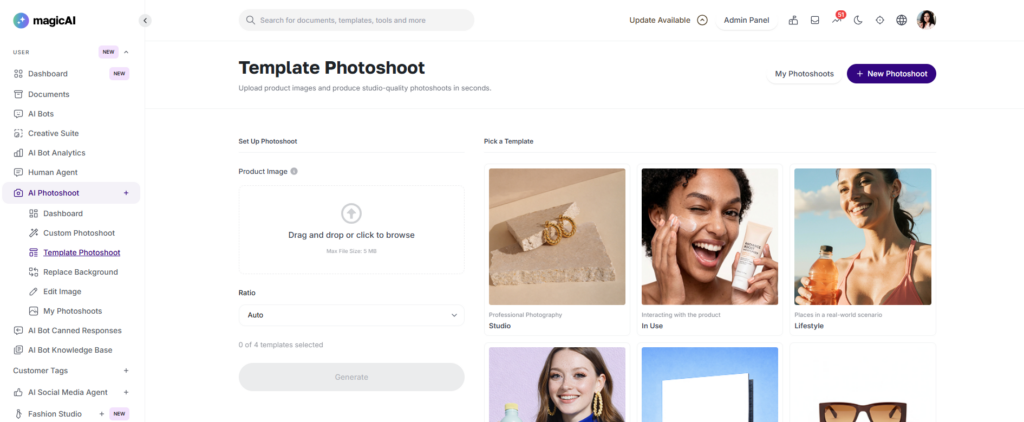
Navigate to AI Photoshoot → Template Photoshoot. This flow uses predefined scene templates to automatically style and place an uploaded product image.
Upload a required e Product Imag(max 5 MB). Select the desired Ratio. Pick up to 4 templates from the right panel — each generation slot corresponds to one selected template. Available templates are: Studio (Professional Photography), In Use (Interacting with the product), Lifestyle (Places in a real-world scenario), UGC (Relatable social media vibe), Billboard (On a real outdoor billboard), Front View (eCommerce Thumbnail), Flatlay (A 90-degree overhead), Editorial (High-end, artistic composition), Composition (Artistic arrangement of relevant items), Ingredient-based (Surrounds with raw materials), Floating (Suspended in mid-air at a dynamic angle), and Contextual (Minimalist). Click Generate to produce one output per selected template.
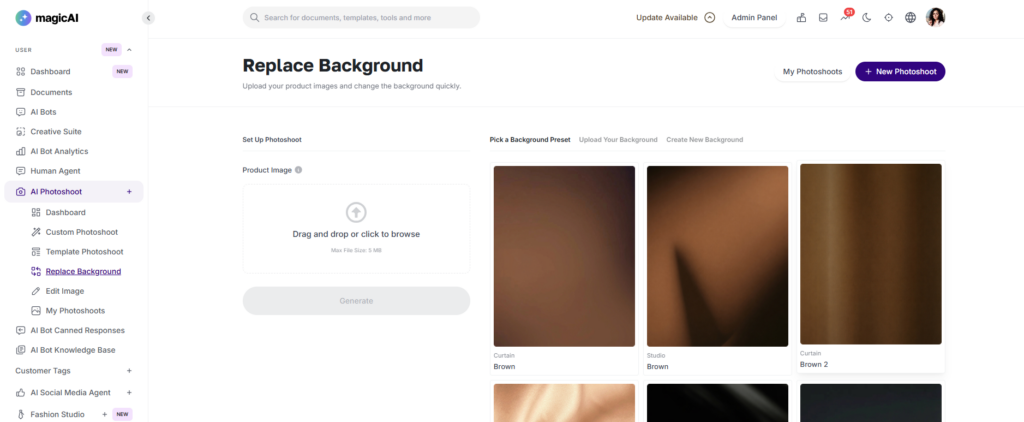
Navigate to AI Photoshoot → Replace Background. This flow replaces the background of an uploaded product image while preserving the product itself.
Upload a Product Image (max 5 MB). Then choose a background source from three tabs: Pick a Background Preset (choose from a library of pre-built background scenes), Upload Your Background (provide your own background image), or Create New Background (describe a custom background with a prompt). Click Generate to apply the new background with realistic lighting and blending.
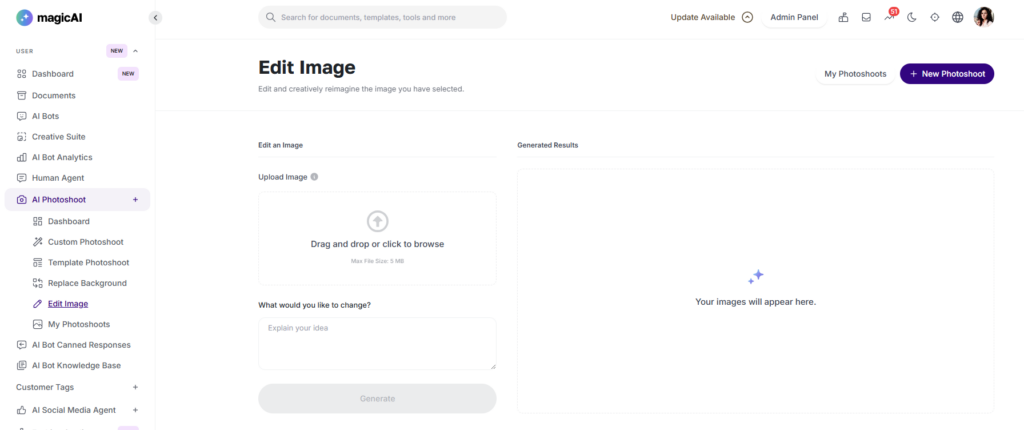
Navigate to AI Photoshoot → Edit Image to modify any image — including previously generated photoshoots. Upload an image (max 5 MB), describe what you want to change in the “What would you like to change?” field, and click Generate. This allows post-creation edits such as adjusting style, modifying elements, or regenerating variations without affecting the original.
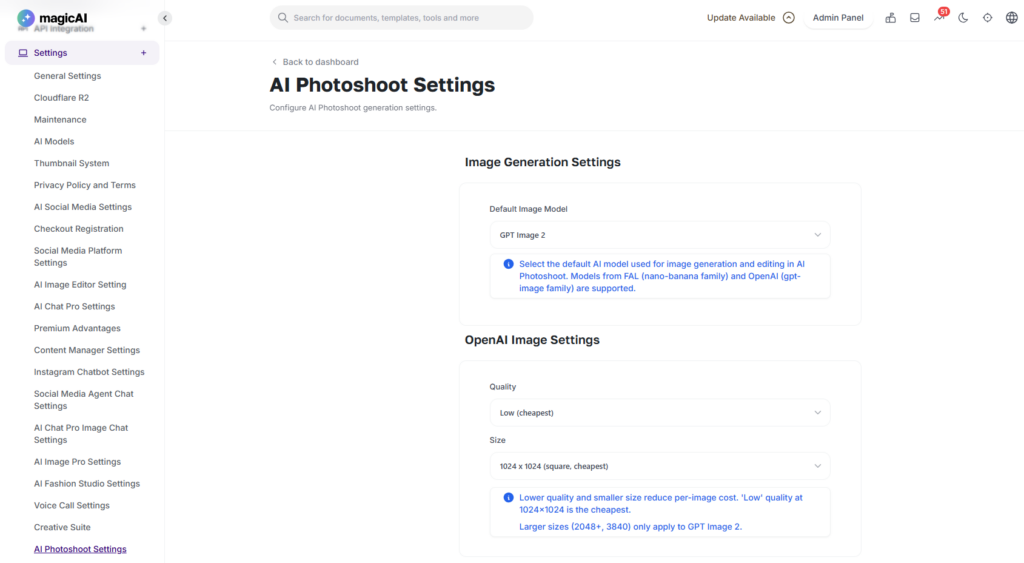
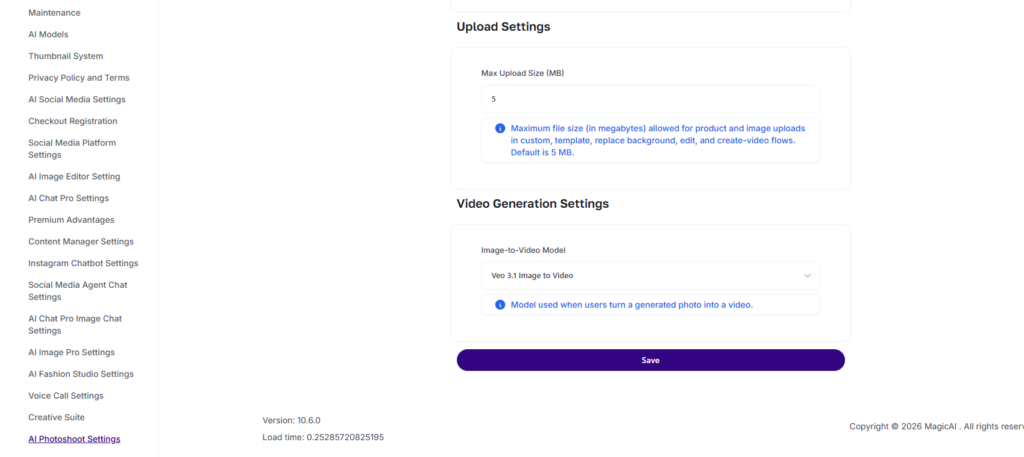
Admins configure AI Photoshoot at Settings → AI Photoshoot Settings, organised into four sections:
Image Generation Settings — Select the Default Image Model used for all generation and editing flows. Supported model families are FAL (Nano Banana) and OpenAI (GPT Image). Options include Nano Banana Pro, GPT Image 1, GPT Image 1.5, and GPT Image 2.
Upload Settings — Set the Max Upload Size (MB) for product and image uploads across all flows (custom, template, replace background, edit, and create-video). Default is 5 MB.
Video Generation Settings — Select the Image-to-Video Model used when users convert a generated photoshoot into a video. Available options are Veo 3.1 Image to Video and Veo 3.1 Image to Video (Fast).
Click Save after making any changes.
⚠️ Note: Plan-based access controls (enabling/disabling AI Photoshoot per pricing tier) are managed via Finance → Pricing Plans.
Adding {{itemName}} to cart
Added {{itemName}} to cart